CarePoint Blog — aed
5 Steps To Shocking The Life Into Someone
Mere seconds ago the 14-year old girl was fighting for a championship soccer victory. Now, she's fighting for her life. While in mid-stride, she suddenly became lifeless and fell to the pitch. Bystanders rush to her side and find her unresponsive and not breathing. One of the bystanders is on the phone with 9-1-1 as the other begins pushing hard and fast in the center of her chest. He then looks up at you and tells you to find an AED...
AEDs are safe. AEDs are designed with safety in mind. The units are programmed so that they will only shock when the victim would benefit from it. The risk of a bystander receiving an unintended shock is also reduced. AEDs give clear and audible directions informing bystanders during times when they should not touch the victim. Some units are also able to sense outside interference (touching) and will not deliver a shock until the interference ceases.
Within minutes, you find an AED located in a cabinet, mounted near the snack-stand. Upon returning to the scene, you find bystanders still performing CPR...
STEP 1: TURN ON THE AED

Depending on the unit, there may be an on/off button to press, or simply opening the cover of the device may turn it on. Some units may turn on automatically when they are removed from their cabinet. Once the unit is activated, it will begin to provide you with audible voice prompts from this point on.
STEP 2: PLACE THE PADS

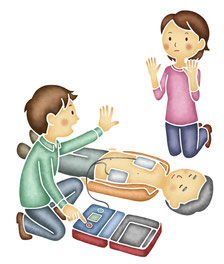
Depending on the age of the victim you'll use either adult or pediatric pads. The pads for some units may be pre-connected, or you may have to connect the pads to the unit. Placing the pads is as easy as looking at the diagrams located on the pads, themselves. Some units show pad placement below the right collarbone and the left underarm. Other devices may have you place one pad in the center of the chest and one in the center of the back. Either way, a quick look at the pads will tell you right where to place them.
STEP 3: CLEAR THE VICTIM
Once the pads are in place, the AED will instruct you to stop CPR and stand clear of the victim. The AED needs a chance to get a clear look at what the victim's heart is doing. Ensuring that no one is touching the victim is important so that nothing interferes with the AED's analysis.
STEP 4: SHOCK!

Once the AED has taken a look at the victims heart activity, it may tell you that a shock is needed. Some units may shock automatically following a brief countdown, while others may direct you to push a flashing "shock" button once you determine that no one is touching the victim. The shock is delivered instantaneously, and may cause the chest and arm muscles to flinch. It is at this point the AED has attempted to stop the victims heart in an effort to allow the heart's generator to start back in an organized, blood-pumping rhythm.
STEP 5: START CPR

Once the shock is delivered, the device will instruct you to begin two minutes of CPR, starting with compressions (pushing on the chest). Some units may direct you through each step of performing CPR, while others may simply count down the two minute period. CPR following a shock is important. Even if the shock successfully restored an organized heart rhythm, the heart muscle may take some time before it starts to respond (beat) to that rhythm. You'll want to leave the AED "On" so that it can continue to analyze the heart's rhythm and, perhaps, direct you to provide additional shocks.
STEP 6: TAKE A CLASS
Ok, so there's no Step 6, but you should know that while these steps can be performed by an untrained bystander, you'll be much more confident and efficient if you take a CPR and AED training class. A great resource to find a local class is the American Heart Association's website. You are also welcome to view our upcoming CPR classes here.
- Randy Boone
- Tags: aed defibrillation how to sudden cardiac arrest
